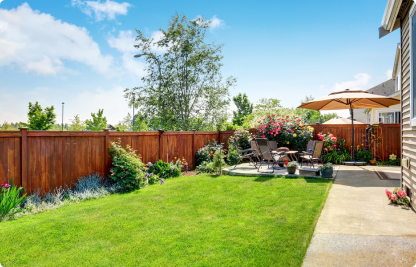
Adding a deck to your garden can help you seamlessly bring the outside in, provide you with a perfect outdoor space where you can spend those warm summer days relaxing in the sun, stargazing in the winter, knocking up a bbq in spring, or just as a garden feature to make the neighbours envious all year round.
The number of reasons to have garden decking is only surpassed by the different shapes, sizes and designs one can come in (check out our raised decking ideas for some inspo!).
We understand that it’s easy to get confused about the best practice in how to lay your new decking once you have finally decided on what to go for, so we have put together this post for those of you out there who have decided to lay your decking onto flat, ground-level grass.
If you are looking for information on which type of decking to choose from plastic to wood then check out our post: Plastic Decking Vs. Wooden Decking
However, if you are wanting a simple and straightforward, beautiful timber deck on ground level grass, separate from your home, then this is the post for you.
We are going to cover exactly what you need to do to plan for your deck, to know how much decking you’ll need, as well as how to prepare your garden and grass for a brand new deck.
If you are going for something a little bit more complicated than a straightforward deck on grass then you should consider giving the professionals a shout, even if it is only for some friendly advice. Call us today on 01236 727776 to speak to a professional.

Planning Your Deck
First things first. Before you start constructing your deck, it would be wise to have a well-designed plan of your deck, know how much decking you need, as well as having all your materials and equipment.
As this is a blog on how to lay your deck on grass, we are going to go ahead and assume that you already have a pretty decent design plan. Something along the lines of “this is my garden, it is this long by this long, I want the deck to go here, it is that long by that long”.
Okay not exactly that simple, but you get the drift. Also ask yourself these questions if you haven’t already:
- How large an area do you want to deck to cover?
- What shape do you want the deck to be?
- Where in the garden do you want it to be? Do you want shade, privacy, closeness to your home?
- Is the ground already level?
- Is the grass and soil okay to build on? If you are unsure contact us here for professional advice
- What type of material to use? Plastic Decking Vs. Wooden Decking

Decking Calculator
Use our decking calculator to find out exactly how much decking you will need to save time, money and stress.
Click here for the Decking Calculator
The decking calculator will take into consideration:
- The length and width of the decking space
- The direction of the timber planks
- The size of the individual deck boards
- If your deck is raised or ground level
- The type of balustrade you would like
- Whether or not you need a gap in the balustrade for entrance/exit, and steps if it is raised
Now you know how much decking you will need to consider what equipment and supplies you will need to lay it. Check out our decking range to see what you need.
Once you have your design, used the decking calculator to know exactly what supplies you need, and gathered up all your equipment, you are ready to start laying your deck.

Laying A Deck On Ground Level Grass
Before you start building your beautiful new deck you first need to prepare your site.
Step 1
Measure out the area you want your deck to cover (this should be in your design plan) and hammer a peg into each of the corners of your deck.
Then run a builder’s line from each of the pegs to outline the site of your deck.
Step 2
Clear away any plants, weeds, rocks, or other material that might be obstructing your site.
Cut away the turf of the lawn by using an edger to cut the area and then a spade to remove it.
Make sure the ground is level, you can do this by checking your site with a straightedge and a spirit level. Remove the turf until the ground is completely even.
Step 3
Cover the area of your site with a layer of weed control fabric to prevent any weed regrowth coming up under your decking.
Then cover the site in 40mm-50mm of gravel.
Step 4
Cut your deck boards to the desired length using the appropriate saw for the job.
Use a pencil to measure and mark the deck board at the desired length, then use a combination square to draw the line across the deck board.
Make sure to measure twice for accuracy before cutting.
Step 5
It’s a good idea to do a trial run to make sure you have everything you need and that you have the exact measurements and supplies needed for the job. If you haven’t already plan your decking by using our decking calculator.
Assemble your sub-frame by measuring your deck frame and cutting to size.
Make two pencil marks where the two outer joists meet the inner joists at the right angle. This is where the coach screws will go.
Use a flat wood bit to drill recesses into each of the eight marks you have just made making sure the screw heads will be flush with the joint surface when done.
Drill a hole through the center of each recess from the outer joist to the adjoining outer joist.
Fit the coach screws using either a drill driver with socket attachment or a socket and ratchet.
That should be your outer frame assembled and now you can move onto securing the inner joists. This is done by securing two coach screws through the outer frame into the inner joists.
Step 6
Lay your deck boards.
Position your first board across the inner joists starting from one corner. Make sure that the deck board is in the opposite direction to the inner joists and flush to the frame.
Mark a cutting line for the end of the first board and cut it to fit making sure you allow an expansion gap of 3mm in your measurements.
Step 7
Get securing your deck boards onto the joists.
This is done by screwing every deck board to every joist that it covers over along the frame. Use two decking screws where each bard meets a joist.
Remember to include the relevant expansion gap between the boards
Step 8
Use a sander to smooth over any cut ends and apply an end grain preserver to protect the timber from rot and decay.
For more on how to care and maintain your deck read our article: Deck Maintenance For Dummies (And Regular Folk)
All our decking boards here at Stewart Timber are made from Swedish red pine, and all are pressure treated to protect from insects, moist and normal decay.
If you’ve got plans to build a wooden deck this spring, we’d recommend you check out our decking calculator! You give us the specifications of what you’d like your deck to be like, we give you a no-obligation quote. Easy peasy.
Or simply call us on 01236 727776 or contact us here.