As homeowners, we take pride in preserving our gardens. Levelling a garden can end up being a hefty job, but trust us when we tell you it will make your life a whole lot easier when it comes to maintaining your garden.
It’s also an extremely practical skill that will save you a few pennies if you’re a DIY fanatic fancying a challenge. It will almost always increase the value of your property when it’s all done so it’s definitely worth it!
Read on to find out exactly how to level a garden.
Causes
When it comes to sloped or uneven lawns there are a few usual suspects that can cause the damage:
Water logging – During the cold and wet winter months, the weather can play a lead role in undoing all your hard work by causing lumpy uneven sections in the garden.
Soil Settlement – Objects like pipes and rocks that are hidden underneath the soil can have an affect on your lawn. Excavating your lawn is the best method of repair.
Animals – The culprits differ depending on where you live, but animals are chief offenders for an uneven lawn. They’ll dig and roam their way around your garden looking for food. If you seed regularly you will give your lawn deeper roots and make it harder for animals to dig up your turf.
Children – If the kids are playing a good old fashioned game of bulldog on the soft garden soil, it will not end well for the lawn. The pressure on the grass will damage the surface of the grass long term.
Nightcrawlers – These insects love to shift soil in their quest for food. It’s just unfortunate that it’s ruining your grass. Lowering the pH level of the soil is a clever way of preventing the issue.
Getting a handle on the causes and issues is essential before starting the levelling process.
This article will provide a definitive guide to levelling your garden that will have all the neighbours peering over your fence with jealousy!
When should you level your garden?
If you’ve been putting your heart and soul into the garden and all you’ve been rewarded with is uneven, bumpy dips then it’s time to take action.
Constantly running into problems with your drainage system is a clear sign that you need to level your garden. Drainage issues can be tricky to fix by yourself so you may need to seek advice from a landscaper.
Damaged pipes are another red flag as they have the tendency to cause uneven ground and can waterlog your garden.
The optimal time to start levelling your garden is throughout springtime. This will allow your wet soil to settle and gives your grass seed enough time to grow. You may be able to get away with a reasonable levelling during Autumn if you get lucky with the weather (bit of a gamble in Scotland!)
The most important thing to remember is making sure your soil is moist and soft before you start. We advise you water your soil a couple of days before you intend to start – if your soil is too wet it will be very difficult to work with.
Soil Moisture Depth
You need to water your soil to a depth of at least 15cm (6 inches) to ensure it is moist enough. You can check your soil moisture depth in a number of ways:
Use a spade – Slice straight into the soil with a sharp spade to what you feel is about 6 inches deep. You can either use your gardening eye to make a decision or you can fetch a ruler from the house for a more reliable reading.
Use your hand – If you don’t mind getting a bit of dirt under your nails you can do it the old fashioned way! Pull up the soil from the required depth and squeeze it in your hand to feel if it is wet.
Soil Moisture Sensor – If you like your gardening gadgets, you can stick your easy to read soil moisture sensor into the ground. It will show you if the soil is moist or dry at the sensor’s depth.
How to level small bumps (shallow low spots)
After evaluating your garden, it’s really important that you choose the correct method of fixing the issue. This will prevent any further damage in the future.
There are two main methods: one for mending small bumps (shallow low spots) and another for deeper holes (deep low spots). Both methods require you to apply a mixture onto the damaged areas of the lawn. Referred to as the top dressing mixture, it must contain 2 parts sand, 2 parts topsoil and 1 part compost. You can make this mixture easily using a spade or a shovel.
For the small bumps (1-2cm deep):
Start by applying a thin layer of our mixture all over the damaged area. Once applied, you need to give it a good ol’ even spread using a garden rake.
You then want to tamp (pack) the soil down with your feet and the rake followed by a little mist of water to help it settle.
Job done for now – leave the mixture to work it’s magic for 48 hours. Make sure to check on the progress!
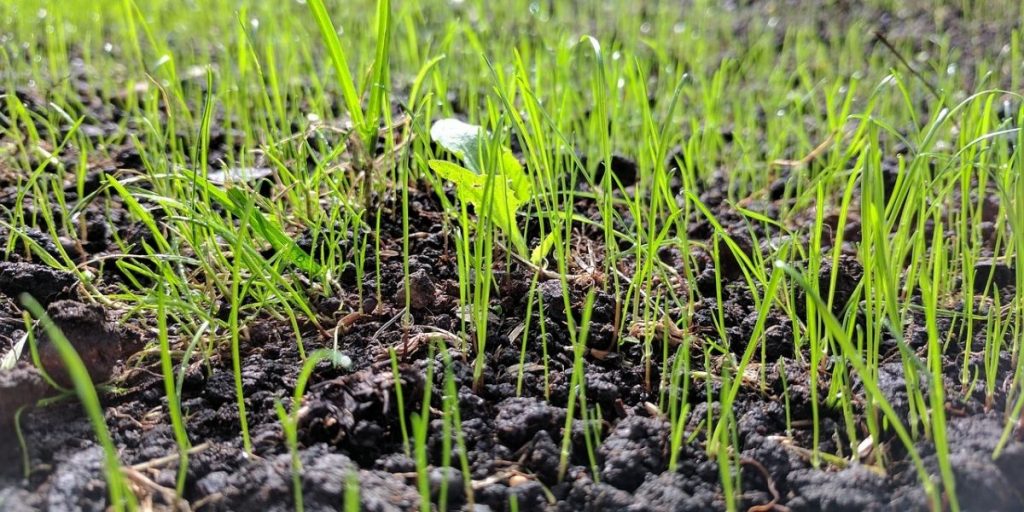
When you come back you can apply the grass seed, as well as another wee top up of topsoil mixture.
For the next 48 hours, give the soil a light spray of water 4 x a day to ensure the grass seeds are germinating.
Finally, water the area regularly to let the grass seeds grow.
How to level deeper holes (deeper low spots)
As you may have thought, levelling deeper holes is the more complex of the two methods:
First off, if your holes are deeper than 2cm you’ll need a squared-off shovel.
Using your shovel, make an ‘X marks the spot’ shape through the deep hole. Your ‘X’ should be around 5cm deep. Make sure the middle of your ‘X’ is aligned with the centre of your hole and the edges of your ‘X’ go beyond the edges of the hole.
Now you want to join the edges of your ‘X’ to form a square with 4 segments.
After you’ve done this, remove each segment one by one keeping the shovel as horizontal as possible to maintain an even thickness of soil. Remember to keep the grass/soil if you are reusing it. (If your soil is too dry and crumbly, you will find out at this stage).
Remove any stones/debris and crumble up any large clumps.
Compact the soil by standing on it (this reduces the chance of future sinking)
Add the mixture (2 parts sand, 2 parts topsoil and 1 part compost) until it fills the designated area.
Rake over the area to break the soil down.
Put back the segments of turf that you originally dug up, or replace them with new turf.
Starting at the edges of your ‘X’ and working in, tamp down the soil. Sprinkle the remaining gaps with the top dressing mixture to prevent them from drying out.
Finally, after all your hard work remember to water regularly to let the grass seeds grow.
How to level a sloping garden
Before you make the decision to level your sloping garden, it’s handy to know that a slight downward slope in the garden is actually key to good drainage. You should have a real think about whether you need to level off your garden. Some mild to moderate slopes may not even need to be levelled off at all.
If your slope is manageable, you should look into the possibility of planting flower beds and veggies. You never want to have exposed soil, so planting flowers and vegetables will ensure your soil remains healthy and your drainage improves.
It will also save you a whole lot of time and money, as well as, making your garden more attractive and practical.
If you do opt for this route, make sure you don’t leave any soil exposed when planting as this can lead to erosion and drainage issues.
Levelling a sloping garden requires different methods depending on the severity of your slope.
Create Low Terraces
One method for levelling a sloping garden is to add stair-like terraces to aid the planting of your plants and veggies etc. Terraces can also provide a great recreational space so you can show off your new and improved garden at all those summer BBQs!
If you are looking to add decking to your terrace, you can use our personalised decking calculator to get an accurate quote back within two days.
For small jobs, it can be as easy as shifting the soil already in your garden, followed by adding braces to the area where you are creating the stairs. If you feel this applies to you, there’s no need to buy fill dirt to help with the structure of the stairs.
For larger job you may want to have a chat with a landscaper to weigh up your best options.
Once that’s done, the next stage is to add your preferred brick, stone, or wood around the steps. The quicker you start planting the better, as this will help prevent your soil from eroding.
Vegetables are a great option for preventing erosion and improving your drainage. However, when it comes to protecting your soil with plants you have to be careful. Only plants with deep roots or rhizomes can keep the terraces stable as their root systems interlock beneath the soil.
Steep Slopes
Terracing steep sloping gardens require a little bit more work than just moving soil around the garden. Although, terracing your garden is still a great way to fix your slope, it requires more attention and stronger reinforcement.
It’s important to move fast when levelling a steep slope to prevent any damage to the foundation of your house. If you’re tackling the slope by yourself it’s essential that you figure out the root of the problem. Choosing the correct and appropriate measures are also very important.
Materials that can be used to level a sloping garden include:
Stone retaining walls – The use of pre-formed concrete blocks, breeze blocks, house bricks or stone. All very reliable for terracing and levelling. The only downside is that they are quite pricey.
Reclaimed railway sleepers – If you want a cheap option, this is your go to. They are built to last as a result of the tar used to treat them. This is also their downside as they are very sticky to touch or sit on. An option for you would be to use them on the lower part of your structure and top them off with un-sticky blocks.
New railway sleepers – They are cleaner, but slightly more expensive than reclaimed railway sleepers. They must be treated over the years to save them from rotting.
Gabion Cages – Made from strong wire mesh, they are well-priced, sturdy and neat. Filled with your choice of stone or rubble, gabions are becoming more and more popular for building retaining walls.
Retaining Wall
An alternative to terracing is to build a retaining wall around the garden. It’s a great option if you’ve not got a huge deal of space, or you don’t want to go through the longer terracing process.
You’ll need to pick yourself up some fill dirt to cover the area between the natural level of your garden and your new retaining wall. We recommend that your retaining wall should be no bigger than 2ft. This is because they take a lot of pressure from the weight of the soil and rain water.
If you would like to make it a little taller, just make sure that your retaining wall leans back into the soil slightly so it has support.
You must also use sturdy materials to build your wall. The materials listed above are ideal as they guarantee strength and reliability.
What does gardening leveling cost?
There is no fixed rate as prices vary depending on a number of factors such as:
The size of your garden
The level of work needing done
The type and size of materials you choose to use
Landscaper’s rate
Landscaper’s expertise and efficiency
Here’s a few average landscaping costs (UK) that can help you make your decision:
Soil Irrigation – £8-10 an hour
Turfing – £14 per square metre (Includes supply, prep and lay costs)
New plants – £30-40 per square metre
Block paving – £70-80 per square metre
Architectural Design and Planning – from £250 depending on the scale of the project.
These prices are all estimated quotes from online sources. In order to get an accurate price you should get in touch with your local landscaper to assess the scope of the project.
Professional costs for levelling a garden with steep slopes can be anywhere between £500-1000 depending on all of the factors listed above. Moderate slopes can cost in the region of £350-600.
Take these prices with a pinch of salt as they are all estimates. We just want to give you a faint idea of what to expect.
If you’re up for a DIY challenge, you may have to rent a grader and a sod cutter if you don’t already own them. They can set you back around £500. You’ll also need a string level, shovel and stakes which you can get for about £10.
If you are going to take it on yourself, make sure to put aside 5 days for the work. You should be honest with yourself and make sure you are capable of doing the job.
Just remember if you don’t get it right the first time it can be a very expensive project!
Get in Touch
If you would like to know more about garden levelling or looking to revamp your garden, we’d love to hear from you!
If you’d like to know more, please don’t hesitate to get in contact. Email us at sales@istaf.co.uk or phone us at 01236 727 776.
There were some pretty intense winds and showers over the Christmas holidays and it may have taken its toll on your perfect garden fence, forcing you to get stuck into some fence repair Google searches. As soon as you notice a chip or crack in your fence, or notice that they are wobbly, slanted, or […]
A deck is an absolutely brilliant space in the summer. A lazy evening handout for a barbeque or a bright morning spot for breakfast, it’s the perfect way to bring a little bit of inside comfort to your garden. Unfortunately, in the Scottish climate, your decking has to weather leafy autumns, chilly winters and wet springs. […]
Timber merchants supplying decking, fencing, sheds & timber products to Glasgow, Edinburgh and surrounding areas.