Welcome to WordPress. This is your first post. Edit or delete it, then start blogging!
☀️ Summer Sale | 10% OFF Almost Everything | Use Code: 10JULYOFF
Ends in . * Terms apply
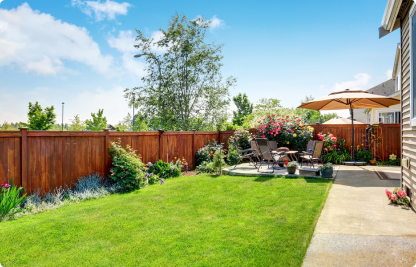
Raised beds are great. They boost drainage. They can easily introduce new soil types. They’re at an easier working height. The soil is consistently warmer. You can easily move them. They even add a bit of sculpture to your garden.
What’s not to love?
In this helpful guide we’ll talk you through the construction process so you can enjoy a raised bed in your garden too.
Railway sleepers are pretty heavy things so it’s best to move them as little as possible.
Plan where your new raised bed is going to go. Think about whether you can sit, stand and kneel at the edges and whether you can access all of the bed without trampling the plants. Also think about the sunshine. Are there any big trees that will cast a shadow? Will your house block the evening sun?
Finally, mark out where you want your raised bed with strips of cardboard or string. This will give you a good feel for the size, placement and look.
Once you’re happy it’s time to get to work.
Roughly level out your surface. It doesn’t have to look like a bowling green but try and get any big differences evened out.
When you’ve got a design you need to pick what sleepers you want. There’s lots of different woods, cuts and styles out there so choose the one that’s best for your garden. We’ve got some rather nice sleepers and we also deliver for free within 30 miles of our yard.
Once you’ve got your sleepers, lay them down to form your base.
Sleepers tend to be heavy so get some help and watch your fingers when you’re placing them down!
When you’ve got your timbers in a shape you’re happy with, it’s time to fix them together. Use heavy duty sleeper screws and make sure at least 50mm of the screw goes into the adjoining sleeper.
Use two screws on each joint for a secure fix.
If you want a tall raised bed you can add more sleepers on top. Simply place a second layer of sleepers on top of the first and use screws to attach the upper layer to the lower.
Remember to overlap the timbers like you would if you were building a brick wall. This stops all the joints lining up and makes the structure as strong as possible.
This is an optional step but it’s one we recommend. Fixing a plastic sheet to the inside of the raised bed creates a barrier between soil and sleeper. This helps with water retention in the bed’s soil and prolongs the life of the sleeper.
Occasionally people will use heavy duty bin bags but the normal method is to use a heavier plastic like a builder’s damp proof membrane.
One of the beauties of raised beds is that you can use whatever soil you want. Even if your garden is naturally high in lime you can fill your planter with compost and grow rhododendrons, azaleas and heathers.
Due to the increased drainage of raised beds they tend to lose soil nutrients faster than their level equivalents. Because of this we recommend using a 50/50 mix of garden soil and peat (or compost with extra fertiliser). This will keep your plants as healthy as possible.
All the hard work is done and it’s time for the best bit.
Enjoy filling your brand new raised bed with tomatoes, roses, potatoes, thyme, lavender and whatever else your heart desires!
Welcome to WordPress. This is your first post. Edit or delete it, then start blogging!
Time Is Not on Your Side The job will take longer than you think. You’ve calculated in extra time already? It’ll still probably take longer. Prepare for the worst; hope for the best. Ask yourself, in an ideal world how long will this take? Then double, or even triple, that amount of time. If you […]
Timber merchants supplying decking, fencing, sheds & timber products to Glasgow, Edinburgh and surrounding areas.

Enter your postcode to check whether we can deliver to you. If not, you can still collect from our store.
Your delivery total will be calculated in your basket, pick up is always free.
Continue Shopping
but you can still pick up from our yard for free.
If your order is over £500 we may be able to make special allowances contact us to enquire about this.
Continue Shopping